 Another school uniform made from the Oliver + S Jump Rope Dress pattern. I used a heavier-weighted twill - the same as I used for the Tea Party Dress uniform jumper.
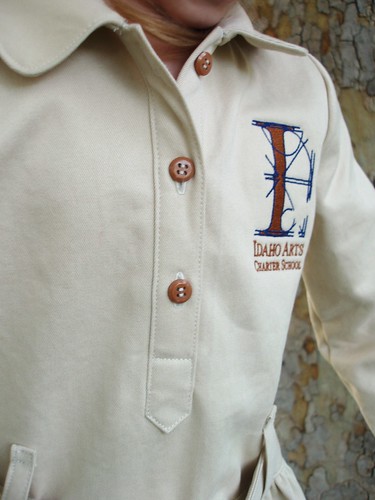 Placket instruction was ingenious - step-by-step teaching all along the way. It's Home-Ec class in a pattern envelope! The only thing I did a bit different was to edgestitch the collar where the pattern actually instructed to 'set it aside for the moment' - only because my fabric was heavier and I knew I couldn't edgestitch the neckline through to the opposite side as straight as I would have liked. (That will make sense when you read the pattern, so if you have a regular weight cotton - just ignore what I said.) Tip #1: Take extra time and preparedness in cutting and marking as precisely as possible - your placket will thank you!
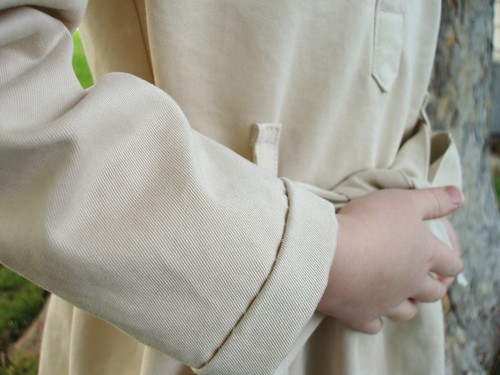 I'm not too sure I'm happy with my blind-hemming technique on the cuff. I think next time I would just tack it at the inside seam and let the remainder hang free... if it bugs me enough, I may take it out and redo it. There are so many ways to blind hem or tack, and some look better than others for various effects... it's been fun to try different techniques though.
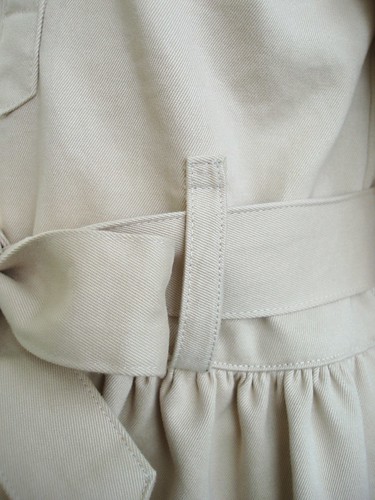 Tip #2: When pressing the loops up as instructed, make sure they are parallel to the side seam to keep them nice and straight. I did and I was really glad. Also - either decrease the length of each loop to 2 1/2 inches or tack them lower than what you see in the photograph above. Otherwise the belt tends to ride higher on the waist. Although you probably wouldn't have noticed had I not mentioned it, no?
 I was too lazy and tired to edit out the logo name for internet purposes - pretend you can't read it, okay? Okay.
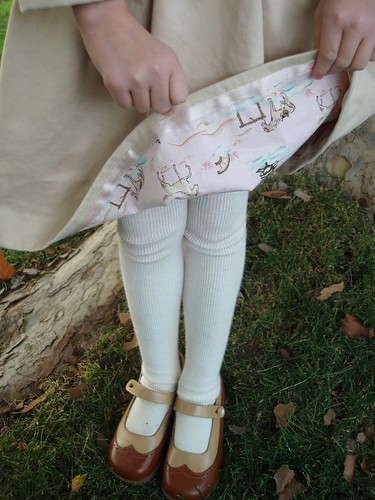
It has now become customary to make a fun lining for my daughter's uniforms. This time I found some fabric that was a mill end from what must have been leftover fabric from the Park City Luxe group by Gymboree. I couldn't pass it up because SweetPea had a blouse from that group with this identical fabric when she was 2-years-old!

Instead of leaving the exposed serged seam, I decided to try some seam binding. But what do you use when you don't have matching seam binding, despite the seamingly (pardon the pun) endless vintage notion supply? Well, matching vintage satin ribbon that you just happen to have on hand.
How does one attach seam binding? By hand. Yeah - all the way around.... on both sides of the ribbon. The end result was well worth it. The ultimate compliment came tonight when my mom said, 'what attachment did you use to do that seam binding?' - that'd be 'the hand that's attached at the end of my arm'. hehe!
How does one attach seam binding? By hand. Yeah - all the way around.... on both sides of the ribbon. The end result was well worth it. The ultimate compliment came tonight when my mom said, 'what attachment did you use to do that seam binding?' - that'd be 'the hand that's attached at the end of my arm'. hehe!
 I am very, very pleased with this pattern. The tailored fit is stunning!

6 comments:
Hi! Just found your blog through flickr :) this is so beautiful! it looks really professional. i'm waiting for my pattern to arrive, can't wait to sew one for my daughter
Totally in love with your creation! It was well worth the time and all the hand sewing (nice sewing attachement). It fits Sweet Pea like heaven and it looks so professional. Thanks also for sharing your tips and experience (so valuable for me)!
You did a great job.
Simply gorgeous work! Great job! I am so tempted to pick up that pattern now! Just not sure about my sewing experience...if I could actually make that...
Found you through the Oliver and S flickr pool. Just had to say how lovely your technique is. So flawless. Great work!
Hi! The dress is very beatiful. I love it. I would like to make it. But I don't have such money to buy the pattern as I am a teenager and live in other country. Would you like to send the pattern to me by email? I'll thank you so much.
Post a Comment