Monday, February 13, 2012

Happy Valentine's

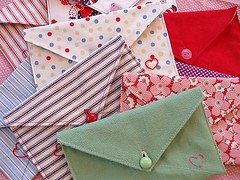
Last year my daughter and I worked together in making these little Valentine's cards for her class*. We are homeschooling now but the idea still lingers as we think of family and friends for this year.


The end product was a melding of two patterns. One was from Sew! Mama! Sew! and Moda Bakeshop.

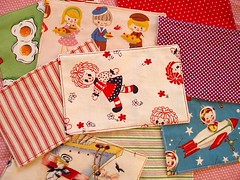
SweetPea would pick out the fabric and buttons to accommodate each person on her list depending on the relationship and then she and I came up with some generic phrases for her to copy using a fabric ink pen. I would finish with hand embroidery following her own handwriting. Granted, I asked for the class list about a month ahead of time so we could have ample time to prepare, but it was quite fun come delivery day.


Regardless of whether you're making a one or two of these for siblings or close friends or for a whole class, it is always fun to have an excuse to play with fabric scraps with your daughter.

* Sweetpea and I visited her old class a couple of months ago and several of the kids came running up to her, gave her lots of hugs and said, "I still have your Valentine!!! I have it on my shelf--- or it's pinned to my wall---- or I kept it for a long time until my little brother got it----- etc..."

Wednesday, November 09, 2011

Merry Christmas Trinket Boxes


Several years ago I was meandering through an antique store near Seattle, Washington. It was at Two French Hens in Burien if you desire to have a peek there sometime - they have the sweetest offerings!

Anyway, I stumbled upon an old stationery box with various old cards -- in it were these little cards so-to-speak that were delicately preserved with their original ribbons and even their envelopes so as to be mailed! The cards were from the early 1900's with crow-quill & ink penned names ~ there was one for Earle, Glen, Ronald, and H.E. Bailey. The rest of the cards were all blank. Of course the cards were quite fragile, but I determined then and there to replicate and offer them to others. They were just too sweet not to share!

With Christmas around the corner, I wanted everyone to have these to use in plenty of time for Holiday gatherings and gift-giving exchanges.

I am calling them the Merry Christmas Trinket Boxes.... enjoy!


Click on the photo above for the free PDF download and step-by-step photograph tutorial with assembly instructions.

Tuesday, August 02, 2011

Clothes Pin Dolls

These are so easy a small child can make them!


Easy-to-Make Clothes Pin Dolls
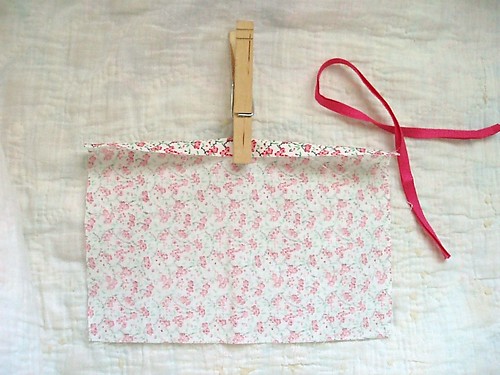
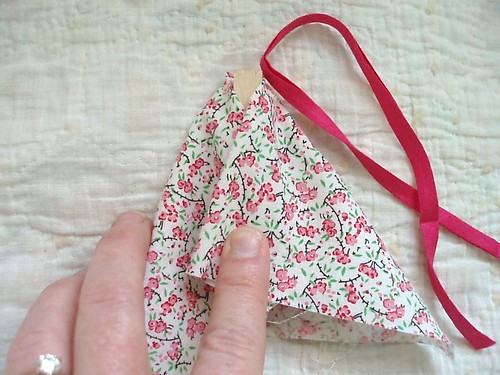
Step 1: Fold a little edge of a square or rectangular fabric scrap and pin it with the clothes pin.


Easy-to-Make Clothes Pin Dolls
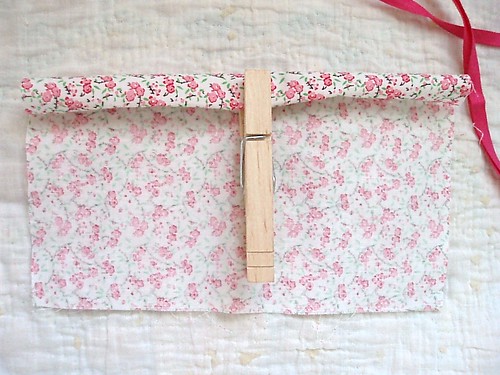
Step 2: Flip the clothes pin down.


Easy-to-Make Clothes Pin Dolls
Step 3: Wrap the fabric corners to the center around the clothes pin.


Easy-to-Make Clothes Pin Dolls
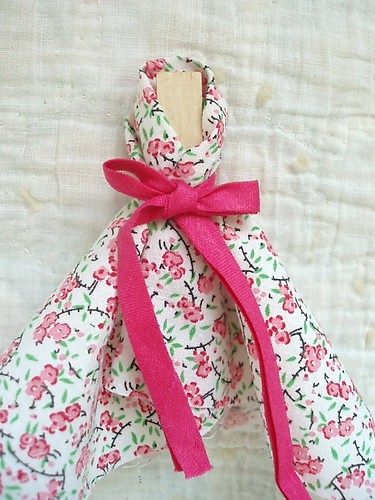
Step 4: Tie a piece of bias tape, yarn, or string around the clothes pin for the neck scarf.


Easy-to-Make Clothes Pin Dolls
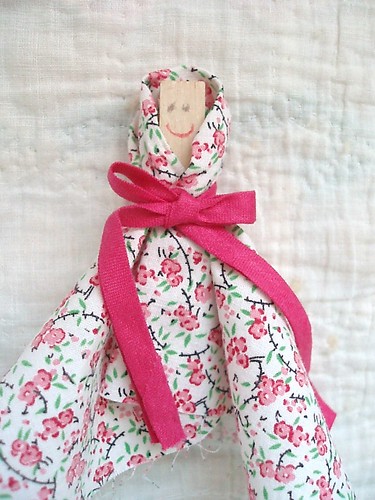
Optional Step 5: (Little Girls like this one, particularly) Draw a face.


You can pink the fabric edges, too, if you want a frilly hem.

Have fun!

Wednesday, February 09, 2011

Singer Tucker Attachment Video Tutorial

How to sew pintucks using an old-fashioned Singer Tucker Attachment.
Demonstration was with a Singer Featherweight 222 Sewing Machine.

Friday, February 04, 2011

Bias Cutting Tutorial


This bias cutting technique has actually been around for quite some time. It wouldn't surprise me if it was something Mary Brooks Picken discovered all on her own when she assisted with the writing and publication of the old Singer Sewing Book. It's a simple trick, really, and makes use of small pieces for fabric conservation!

Sometimes I have a little piece of fabric leftover from a project, but not enough to cut long strips for bias trim - and it would be tedious to sew several small strips together. Other times I want to conserve every last fiber of yardage because of the fabric rarity or cost. I have a feeling I will be using this technique often for my Liberty remnant prints!
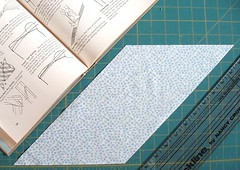

To begin, cut a parallelogram shape from fabric with the long sides being cut on the bias and the short sides being cut on the straight of grain.
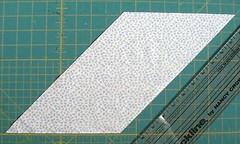
Long sides are cut on the bias and short sides are cut on the straight of grain
(as indicated by the grid on the cutting mat)


Accuracy is very, very important, and can make a difference in the end result, so be sure to cut the short (straight-grain) side and bias side very straight like you see in the photograph below.

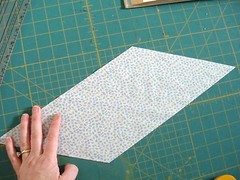
Turn your fabric piece so that the bias edge is aligned to a straight line on the cutting mat grid and the straight-grain edge is aligned to the bias cutting line on the grid. This will allow you to draw parallel lines spaced evenly (following the straight lines on the grid) for perfectly straight bias strips.
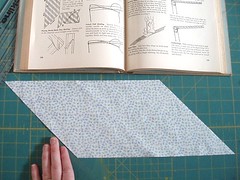
Now you can draw your bias lines using the measurements on your cutting mat. Whether you want bias that measures 1 inch, 1.5 inches, etc.... with a fabric marking pen, you can use the straight lines on the grid as your guide to mark parallel bias-cutting lines.
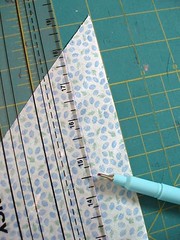

On the back side of the fabric piece measure and mark your bias strips to your desired width. It does not matter what width you prefer, this technique is applicable for any bias width desired.
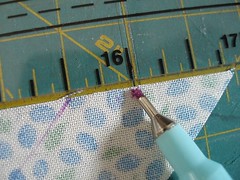

Taking the Singer Sewing Book technique one step further, on one *straight-edge side*, make a mark 1/2-inch on either the right or the left side (it doesn't matter which) of each bias line.
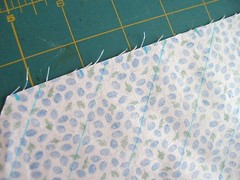
In the photo above, I made my marks 1/2-inch to the left of each bias line.
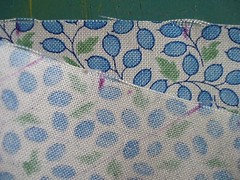
After you make your 1/2-inch marks, transfer them to the right side of the fabric so you can easily see them when you align right sides together in the next step.
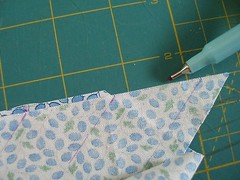
Begin matching right sides together with the two straight-edge sides. Make sure that you have one full bias width (as indicated by the pen in the photo above) that will NOT get stitched... simultaneously aligning the bias lines on one straight edge side to the 1/2-inch marks you made on the other straight edge side as you will see in the next photo.
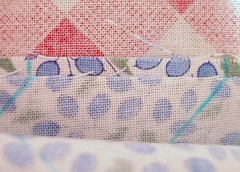
Precisely pinning the two straight-edge sides together, align the bias lines of one edge to the 1/2-inch marks you made on the other edge. This will ensure that after stitching the two sides together, your bias lines will align straight and and continuous despite the seam allowances.
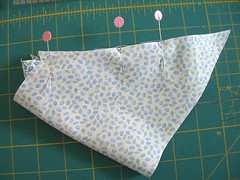
When you bring the straight-edge sides together it will seem a bit awkward, but this is normal.

NOTE: You will need to have one full width of bias (which will NOT get stitched) on at least one end when you pin it together as indicated by the previous two pictures in the tutorial.
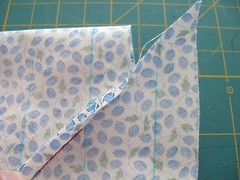

Stitch the two straight ends together using a 1/4-inch seam allowance. Again, being precise is very important.

Notice the red stitching in the photo above? I stopped just short of the last full width of bias. There is now a full bias width that was not stitched as indicated in previous photo instructions. (the extra little width on the right side is just excess and will get cut off)
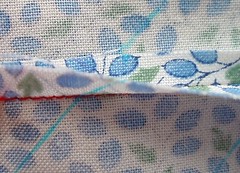
When you align the bias lines on one side to the 1/2-inch marks you made on the other side, after stitching the right sides together, your bias lines should run in a continuous line - even through the seam you just stitched.

You can see below how the bias lines are now perfectly aligned running continuous through the seam - essentially forming a fabric tube.
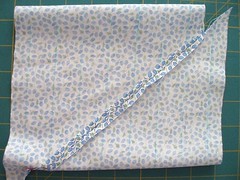
Using a pressing ham or rolled towel, insert it into your fabric tube and press the seam allowances open.
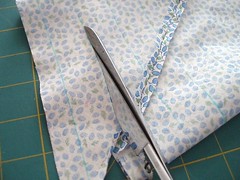
Beginning with the side edge that has your un-stitched full-bias width, begin cutting following the bias line that you marked.

You should just keep cutting with the lines essentially forming one continuous path. Trim any excess.

My 8 x 18 inch fabric piece yielded 82 inches of one-inch bias!

Friday, January 28, 2011

Flat Felled Seams - Tutorial

This tutorial was featured on the Oliver + S blog.


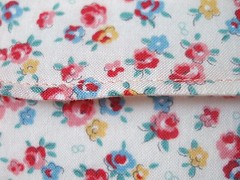
A flat-felled seam is accomplished by sewing two lines of stitching at the seam while simultaneously enclosing the raw edges of the fabric. This seam finish not only prevents unraveling or fraying, but makes the seam very strong. It also gives the finished garment a clean finish on this inside. A flat-felled seam is commonly found on denim jeans and men's dress shirts as well as on reversible garments. I've even seen this feature instructed in vintage patterns for boy's and men's pajamas. It adds one more touch of professionalism to a hand-made garment.


To begin, stitch the seam with the fabric pieces wrong sides together. You can determine how wide you want your flat-felled seam to be by how much you trim your seam allowances. Begin by trimming only one side to the desired width of the finished seam allowances.


Trim the second seam allowances to twice the width of the first. For this example, I stitched a ½” seam and then trimmed the first seam allowance to ¼”, which means I didn’t need to trim the second seam allowance since it was already twice the width of the first
.


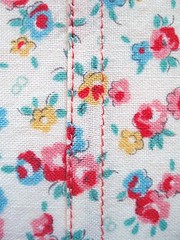
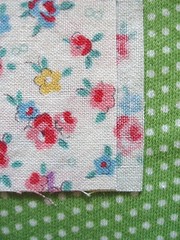
Fold and press the wider seam allowance around the shorter seam allowance so the raw edge of the second (wider) seam allowance meets the first seam line. Then stitch along the folded edge of the second seam allowance. This encloses the raw edge, and with the second row of stitching creates a very strong seam.


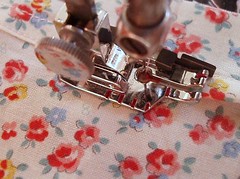
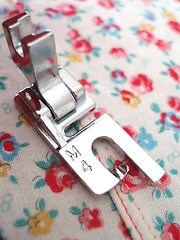
To make my stitching rows evenly spaced, I used a 1/4-inch foot. The black guide on the right followed the first stitching line while the inside edge of the little toe was a guide for sewing the second stitching line.


~ ~ ~ ~ ~


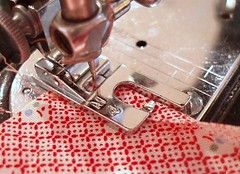
Another useful tool is the Felling Foot, because it folds, presses, and stitches the first row of stitches all in one pass. Using this attachment, while still accommodating a 1/2-inch seam allowance, I trimmed 1/8 inch from each of the seam allowances prior to stitching so that the finished seam would finish with the correct seam allowance according to the pattern.


To begin, space the top seam allowance 1/8 inch to the left of the bottom seam allowance as shown in the photo above. Finger press and fold the start of the seam so that you can stitch 2-3 stitches to secure the folds in place. With the needle still in position, maneuver the bottom seam allowance into the Felling foot so that it curves up and around - sewing slowly, carefully begin stitching to allow the bottom seam allowance to fold over the top seam allowance so that the folds can be stitched in place for the first stitching line.


Simultaneously, the attachment is folding, pressing and allowing the needle to stitch the initial seam enclosed. Press the enclosed seam so that you can make the final pass with the attachment.


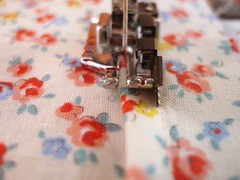
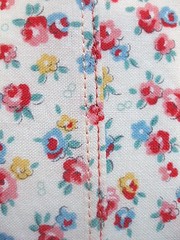
Using the Feller attachment for the second pass, slip the stitched fold up into the attachment with the right toe set up against the outside of the first row of stitches. Allow the fold to carefully pass under the foot while stitching it in place for the finished Flat-Felled Seam. The 4mm Feller Attachment makes a dainty, 1/8" narrow flat-felled seam.


Monday, September 20, 2010

Seam Finishes - Bound Seams

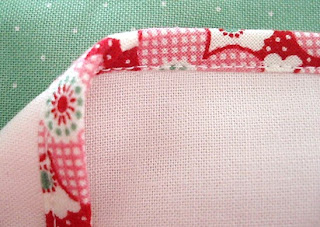
Press the bias raw edge towards the seam allowance raw edge, leaving a little gap between them.

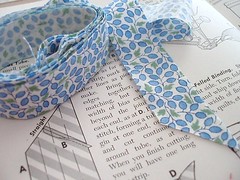
Bias Binding is a strip of material cut on the bias for extra stretch and often doubled. It is used for binding hems, interfacings or for edge decoration and is very useful for many sewing projects. It adds a touch of embellishment to set your garment or project apart for a more professional appearance. You can purchase ready-made bias or make your own. Bias-making tools are helpful and efficient, but a good steam iron is the necessary tool! I personally prefer to make my own because I can customize it to my project, but some of the old-fashioned vintage unused packages can be quite fun to put to use, too! The focus of this tutorial will be set around making your own bias.

For a 1/4"-wide finished binding, you'll need to start with 1"-wide bias strips, for a 3/8”-wide finished binding, you’ll need to start with 1½”-wide bias strips, and for 1/2"-wide finished binding, you'll need 2"-wide bias strips). The following illustrations will show how you can enclose the raw edges of your seam allowances using your regular presser foot on your sewing machine or by way of an old Singer Attachment.

I prefer a 1/4" wide finished binding, so my illustrations will reflect using 1"-wide bias strips. Stitch your seam as directed in your pattern instructions - with Oliver + S, this is a 1/2 inch seam allowance. To follow with binding, trim the seam allowances to about 3/16 inch. Press a crisp fold in the bias towards the seam allowance raw edge as shown in the illustration above - but leave a narrow gap between the raw edge of the bias and the raw edges of the seam allowance. Leaving the little gap will make for a smooth, crisp edge when it is folded over and stitched in the final pass.

Stitching the bias-binding in place

Fold and press the folded bias over the raw edge and stitch in place. Trimming your seam allowances will help to ensure that your previous stitching lines are covered within the bias as it is folded over and stitched.


Finished bound seam

This method is particularly useful for finishing seams on heavier fabrics. (Be sure to choose a very lightweight cotton such as lawn or batiste so as not to add any unnecessary bulk at the seam allowances.) Using a contrasting fabric adds that last finished touch to the inside of a garment - such as this Sunday Brunch Jacket I made for my daughter.
The following illustrations are shown using an old Singer Binder Attachment and 15/16" wide bias strips. (A little bit of trivia: Remember, the tutorial illustrating the Singer Hand-Crank Pinker? Using a straight-edge disk, the cutting guide was specifically designed for 15/16" maximum width cut for this very purpose!) A Singer Binder was included as a standard basic attachment with most vintage Singer Sewing Machines but are still useful for today. If you want to avoid the extra steps of pressing - this attachment will aid in stitching, folding, and binding the raw edges all at one time. Granted, it does take a bit of practice to get the feel and direction to hold the bias strips correctly, but there is something fun about using tools from days gone by.

Binding a seam using a Singer Binder Attachment

The engineering of this attachment basically allows only for traditional cotton quilting wovens to be used but is particularly helpful for quickly binding seams or binding the edge of a single layer piece of fabric (I.e. Aprons, ties or sashes, bibs, collars, etc.) all in one pass. You will find more ideas and samples at April1930s.Com.


Bias is fed, folded, stitched and bound in place

The Bias Strip is guided through the attachment while simultaneously being folded, stitched in place and enclosing the raw edge of the seam allowances. You can use this attachment for a variety of bias-width cuts, but the maximum width allowed through the binder is 15/16".


Inside seam showing a bound seam allowance


When you are finished, be sure to press the seam allowance in the proper direction as directed in your pattern instructions.

Press the seam allowance in the proper direction for a professional finish