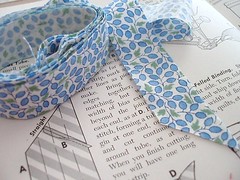
This bias cutting technique has actually been around for quite some time. It wouldn't surprise me if it was something Mary Brooks Picken discovered all on her own when she assisted with the writing and publication of the old Singer Sewing Book. It's a simple trick, really, and makes use of small pieces for fabric conservation!
Sometimes I have a little piece of fabric leftover from a project, but not enough to cut long strips for bias trim - and it would be tedious to sew several small strips together. Other times I want to conserve every last fiber of yardage because of the fabric rarity or cost. I have a feeling I will be using this technique often for my Liberty remnant prints!
Sometimes I have a little piece of fabric leftover from a project, but not enough to cut long strips for bias trim - and it would be tedious to sew several small strips together. Other times I want to conserve every last fiber of yardage because of the fabric rarity or cost. I have a feeling I will be using this technique often for my Liberty remnant prints!
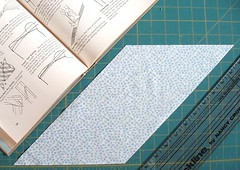
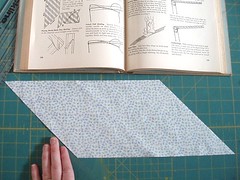
To begin, cut a parallelogram shape from fabric with the long sides being cut on the bias and the short sides being cut on the straight of grain.
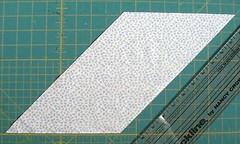 Long sides are cut on the bias and short sides are cut on the straight of grain
(as indicated by the grid on the cutting mat)

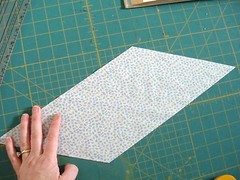 Turn your fabric piece so that the bias edge is aligned to a straight line on the cutting mat grid and the straight-grain edge is aligned to the bias cutting line on the grid. This will allow you to draw parallel lines spaced evenly (following the straight lines on the grid) for perfectly straight bias strips.
 Now you can draw your bias lines using the measurements on your cutting mat. Whether you want bias that measures 1 inch, 1.5 inches, etc.... with a fabric marking pen, you can use the straight lines on the grid as your guide to mark parallel bias-cutting lines.
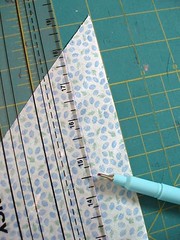
On the back side of the fabric piece measure and mark your bias strips to your desired width. It does not matter what width you prefer, this technique is applicable for any bias width desired.
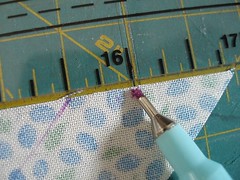 Taking the Singer Sewing Book technique one step further, on one *straight-edge side*, make a mark 1/2-inch on either the right or the left side (it doesn't matter which) of each bias line.
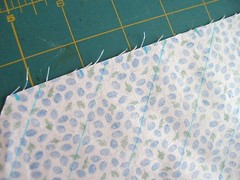 In the photo above, I made my marks 1/2-inch to the left of each bias line.
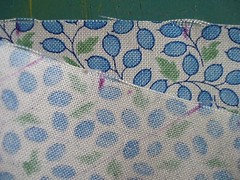 After you make your 1/2-inch marks, transfer them to the right side of the fabric so you can easily see them when you align right sides together in the next step.
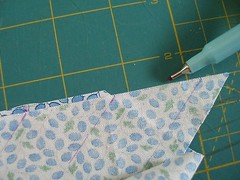 Begin matching right sides together with the two straight-edge sides. Make sure that you have one full bias width (as indicated by the pen in the photo above) that will NOT get stitched... simultaneously aligning the bias lines on one straight edge side to the 1/2-inch marks you made on the other straight edge side as you will see in the next photo.
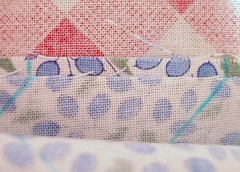 Precisely pinning the two straight-edge sides together, align the bias lines of one edge to the 1/2-inch marks you made on the other edge. This will ensure that after stitching the two sides together, your bias lines will align straight and and continuous despite the seam allowances.
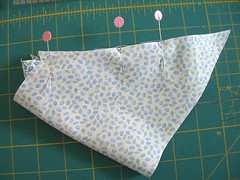 When you bring the straight-edge sides together it will seem a bit awkward, but this is normal.
NOTE: You will need to have one full width of bias (which will NOT get stitched) on at least one end when you pin it together as indicated by the previous two pictures in the tutorial.
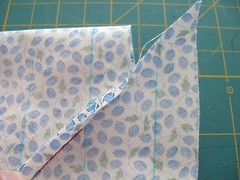 Stitch the two straight ends together using a 1/4-inch seam allowance. Again, being precise is very important.
Notice the red stitching in the photo above? I stopped just short of the last full width of bias. There is now a full bias width that was not stitched as indicated in previous photo instructions. (the extra little width on the right side is just excess and will get cut off)
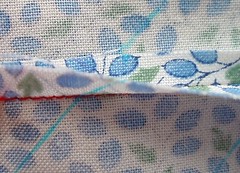 When you align the bias lines on one side to the 1/2-inch marks you made on the other side, after stitching the right sides together, your bias lines should run in a continuous line - even through the seam you just stitched.
You can see below how the bias lines are now perfectly aligned running continuous through the seam - essentially forming a fabric tube.
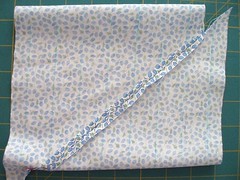 Using a pressing ham or rolled towel, insert it into your fabric tube and press the seam allowances open.
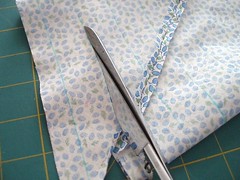 Beginning with the side edge that has your un-stitched full-bias width, begin cutting following the bias line that you marked.
 You should just keep cutting with the lines essentially forming one continuous path. Trim any excess.
My 8 x 18 inch fabric piece yielded 82 inches of one-inch bias!



7 comments:
This is exactly the way my mum taught me how to make bias. It's so easy and uncomplicated, thanks for the refresher course.
April... thank you for always putting forth 110%. When I look at all the sewing information that you make available for free I am always so touched... It seems you understand all the layers of sewing and really know how important that they really are and you make sure that they won't be forgotten... thank you!
Gwen
I love this method! It took me 4 blog articles and 3 youtube videos but I finally got it!
Thanks for posting this. This method is so much easier than the method I have been using.
I am curious how wide you would cut the bias strip if you want to use the binder foot to fold it and sew it?
Thank you for putting so much detail into your tutorial. Though I have seen this emthod mentioned elsewhere, your instructions are the first ones to create a fool-proof result. I so want to be wise using my fabric stash. :)
Have I told you lately that I love you? Thanks again for this tutorial, friend!!
Howdy bra blogg! Kräver att köra en blogg som denna en hel del arbete? Jag har praktiskt taget ingen kunskap om programmering men jag hade hoppats att starta min egen blogg inom en snar framtid. Hur som helst, om du har några idéer eller tekniker till nya blogg ägare gärna aktie. Jag vet att detta är av ämnet Men jag var bara tvungen att fråga. Tack!
Post a Comment